② Design — Fit Your Space
Resize
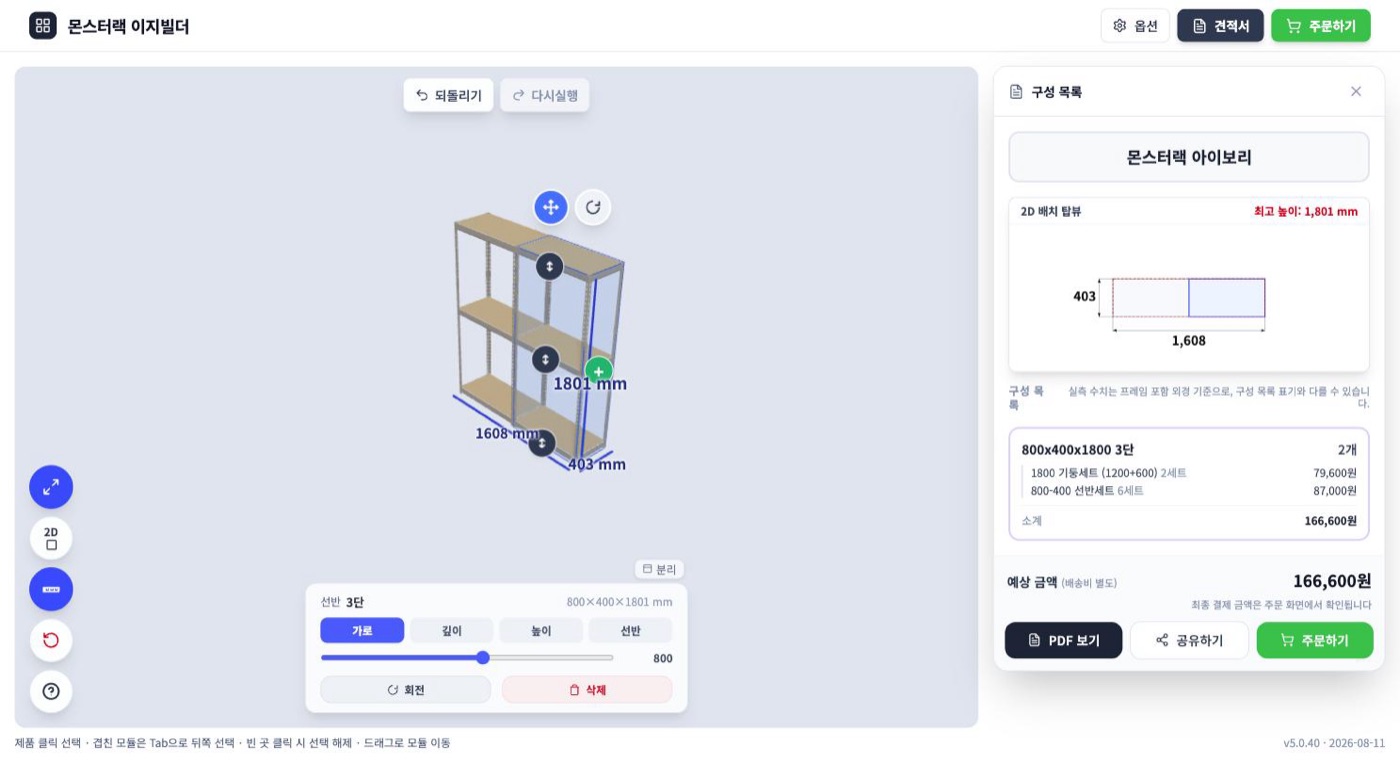
Click a rack to select it and the edit panel appears below. Pick the Width · Depth · Height · Shelves tab and move the slider — the 3D canvas and dimension labels update in real time. Use the Shelves tab to adjust the number of tiers.
💡 Grab the ↕ handle on any shelf to move its height one slot at a time. If the items you store change height later, the real rack adjusts the same way — a signature Monster Rack feature.
Connect racks
Press the green + button next to a rack and an identical module snaps on beside it. Connected modules share posts, so they use fewer parts than buying them separately. Each module can be clicked to resize independently, or Detached · Rotated · Deleted.
Choose add-on options
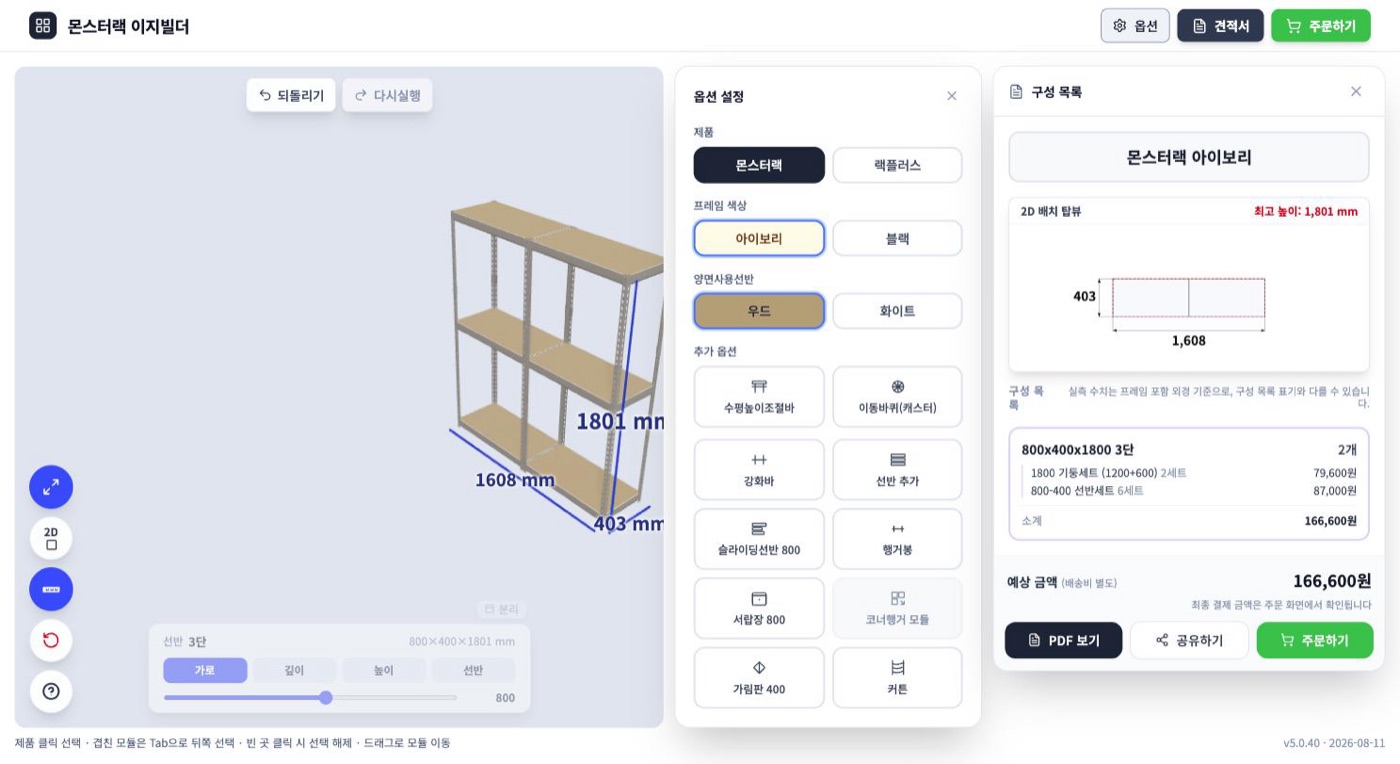
Press Options at the top to choose add-on accessories alongside your product and color.
- Leveling feet — keep the rack plumb on uneven floors.
- Castors (wheels) — when you want to roll the rack around.
- Reinforcement bar — brace against sagging under heavy loads.
- Extra shelves · sliding shelves · drawer units · hanging rods · back panels · curtains — to suit your use.
💡 Not sure which options fit your use? Save the basic configuration first, then send the design link to chat support on the official store and ask.